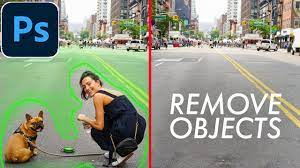
How to Remove Objects in Photoshop

Are you tired of having unwanted objects ruin your perfect photos?
In this article, we’ll show you how to easily remove objects in Photoshop.
You’ll learn how to use powerful tools like the Clone Stamp Tool, Content-Aware Fill, Healing Brush Tool, Patch Tool, and Spot Healing Brush Tool.
With these techniques, you’ll be able to make your photos flawless by eliminating any distractions.
Get ready to take your editing skills to the next level!
Understanding the Clone Stamp Tool
To understand the Clone Stamp Tool, you’ll need to practice using it to duplicate and remove unwanted objects in your photos.
This tool is a powerful feature in Photoshop that allows you to clone parts of an image and apply them to other areas seamlessly.
By selecting the Clone Stamp Tool and adjusting the brush size and hardness, you can easily remove those annoying objects that ruin the composition of your photos.
Simply hold down the Alt key and click on an area you want to clone from, and then release the Alt key and click on the area you want to remove.
With a few strokes, you can make those unwanted objects disappear, leaving you with a clean and professional-looking image.
Mastering the Content-Aware Fill Feature
You can quickly become proficient in using the Content-Aware Fill feature in Photoshop to seamlessly eliminate unwanted elements from your images. With this powerful tool, you can easily remove distractions, blemishes, or even entire objects from your photos.
Simply select the object you want to remove using the lasso or marquee tool, and then go to Edit > Fill > Content-Aware. Photoshop will analyze the surrounding pixels and intelligently fill in the selected area with data from the surrounding image. The result is a smooth and natural-looking removal, as if the object was never there in the first place.
You can further refine the results by adjusting the settings and using the Spot Healing Brush tool to blend any remaining imperfections.
Utilizing the Healing Brush Tool
When using the Healing Brush tool, simply select the area you want to fix and brush over it to seamlessly blend the imperfections. This powerful tool in Photoshop allows you to easily remove blemishes, scratches, or other unwanted elements from your images.
Whether it’s a distracting object in the background or a small spot on someone’s face, the Healing Brush tool can work wonders. Just make sure you choose a sample area that matches the texture and color of the area you want to fix.
Once you’ve selected your sample, start brushing over the imperfection, and watch as it magically disappears. The Healing Brush tool is a must-have for any photo editing enthusiast, providing a quick and effective way to make your images look flawless.
Exploring the Patch Tool for Object Removal
Simply select the area you want to fix and blend the imperfections seamlessly with the Healing Brush tool.
But what if you want to remove larger objects or unwanted elements from your photos? That’s where the Patch Tool comes in handy.
This powerful tool allows you to select a specific area and replace it with a sample of another area. It’s like magic!
To use the Patch Tool, first, select it from the toolbar. Then, draw a selection around the object or area you want to remove.
Next, click and drag the selected area to a clean and similar part of the image. Finally, release the mouse button and let Photoshop work its magic.
The Patch Tool will seamlessly blend the selected area with the surrounding pixels, leaving no trace of the object you wanted to remove.
It’s a simple and effective way to clean up your photos and achieve that flawless look.
Removing Unwanted Objects With the Spot Healing Brush Tool
To effortlessly eliminate unwanted elements from your images, try utilizing the Spot Healing Brush tool.
This handy tool in Photoshop allows you to seamlessly remove blemishes, objects, or distractions from your photos.
Simply select the Spot Healing Brush tool from the toolbar, adjust the brush size to match the area you want to remove, and then click and drag over the unwanted element.
The Spot Healing Brush will automatically analyze the surrounding pixels and blend them in to fill the area, leaving no trace of the unwanted object.
It’s a quick and efficient way to clean up your images and achieve a polished result.
Give it a try and watch your photos transform before your eyes.
Conclusion
So there you have it! With the help of Photoshop’s powerful tools, removing unwanted objects from your images is easier than ever.
By understanding the Clone Stamp Tool, mastering the Content-Aware Fill feature, utilizing the Healing Brush Tool, exploring the Patch Tool, and using the Spot Healing Brush Tool, you can seamlessly erase any distractions and create stunning, clean visuals.
Remember to practice and experiment with these techniques to become a pro at object removal in Photoshop.
Happy editing!

