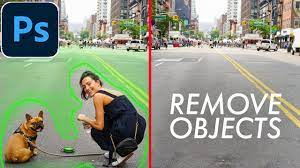
How to Remove Object in Photoshop

Are you tired of unwanted objects ruining your photos? Look no further! In this article, we’ll show you how to remove objects in Photoshop.
You’ll learn how to choose the right selection tool, refine your selection, and effectively remove the object.
We’ll also guide you through cleaning up the background and adding those final touches.
So grab your mouse and get ready to transform your photos in no time!
Choosing the Right Selection Tool
To choose the right selection tool, you’ll want to consider the shape and complexity of the object you want to remove in Photoshop. If the object has a simple shape and clear edges, the Rectangular Marquee tool or the Elliptical Marquee tool would be ideal. These tools allow you to create rectangular or elliptical selections around the object, making it easier to remove.
However, if the object has irregular edges or intricate details, you’ll need a more precise tool like the Polygonal Lasso tool or the Magnetic Lasso tool. These tools allow you to manually trace the edges of the object, ensuring a more accurate selection.
Additionally, the Quick Selection tool can be used for objects with well-defined edges, as it automatically detects and selects similar areas.
Refining the Selection
First, make sure you’ve selected the appropriate area that you want to refine in Photoshop. Once you have your selection, it’s time to refine it to achieve a more precise result.
Photoshop offers several tools to help you with this process. One of the most commonly used tools is the Refine Edge tool. With this tool, you can fine-tune the edges of your selection, making them appear smoother and more natural.
Simply select the Refine Edge tool from the toolbar, and then adjust the settings to your liking. You can control parameters such as edge detection, feathering, smoothing, and more. Experiment with these settings until you’re satisfied with the refined selection.
Removing the Object
Once you’ve refined your selection in Photoshop, you can easily eliminate the unwanted element from your image.
To do this, simply go to the Edit menu and select Fill.
In the Fill dialog box, choose Content-Aware from the Use dropdown menu. This powerful feature analyzes the surrounding pixels and intelligently fills in the area with similar textures and colors.
Click OK to apply the fill and watch as the unwanted object magically disappears.
If you’re not satisfied with the result, you can always use the Clone Stamp tool to manually remove any remaining traces of the object.
Just select the tool, choose a brush size, and carefully paint over the area.
With these simple steps, you can effortlessly remove any unwanted elements from your images and achieve a clean, professional look.
Cleaning up the Background
If you’re looking to clean up the background of your image, simply use the Clone Stamp tool to manually remove any unwanted elements. This tool is perfect for getting rid of distracting objects or blemishes in your photos.
Start by selecting the Clone Stamp tool from the toolbar on the left side of your Photoshop workspace. Then, choose a brush size that matches the area you want to clone.
Hold down the Alt key and click on an area of the image that you want to sample. Now, you can start painting over the unwanted elements in the background. The Clone Stamp tool will automatically copy the sampled area and replace it with the stroke of your brush.
Keep cloning until you’ve successfully cleaned up the entire background.
Final Touches and Exporting the Image
To add the final touches and export the image, you can adjust the brightness and contrast using the Levels adjustment tool.
This tool allows you to fine-tune the exposure and overall look of your image. By adjusting the brightness, you can make your image lighter or darker, depending on the desired effect. Similarly, adjusting the contrast can enhance the difference between light and dark areas, making your image more dynamic.
To use the Levels adjustment tool, go to the ‘Image’ menu, select ‘Adjustments,’ and then choose ‘Levels.’ A dialog box will appear, displaying a histogram and sliders for adjusting the black, white, and mid-tone levels. By moving these sliders, you can modify the brightness and contrast of your image.
Once you’re satisfied with the results, you can export the image in your preferred format, such as JPEG or PNG, by going to the ‘File’ menu and selecting ‘Export’ or ‘Save As.’
Conclusion
So there you have it! Removing objects in Photoshop is a breeze once you know the right tools and techniques.
By choosing the appropriate selection tool, refining the selection, and carefully removing the object, you can achieve seamless results.
Don’t forget to clean up the background and add any final touches before exporting the image.
With a little practice, you’ll be a pro at removing objects in no time.
Happy editing!

